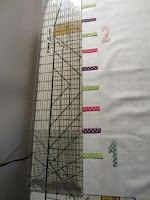
 1. Following the manufacturers directions, adhere Heat N Bond to the back of your 3/8 inch ribbons. Once bonded, cut each ribbon into 1 1/2 inch pieces.
 5. Pin your strip of Cs to the left side of piece A with right sides together. Stitch. Cut off extra at end and repeat with the right side of piece A. Press the seams toward the outside.
 6. Pin remaining strip of Cs to the top of piece A with right sides together. Stitch. Cut off extra at end and repeat with bottom of piece A. Press the seams toward the outside.
 7. You have completed the top of your growth chart. You will now have a piece measuring 66 1/2 inches by 12 1/2 inches.
 8. Now you will place piece B on top of your completed growth chart. Match right sides together and pin along all four sides. Remember to leave about a 5 inch opening for turning at the top center of the chart. (I like to mark that opening with double pins so I don't forget.)
 11. Top stitch about 1/8 inch in around all four sides. This will help your project to lay flat and will also close your opening.
 12. Cut your wide ribbon into a 40 inch length. Tie a bow in the middle with the ends hanging. Pin the bow onto the top of the growth chart and sew to secure. Trim the ends if needed.


1 comment:
This is ADORABLE! I love the idea of a growth chart and have been thinking of asking Ryan to make me a simple one that looks like a yard stick. You are putting me over the edge.
Post a Comment