Showing posts with label car caddy. Show all posts

Monday, December 13, 2010

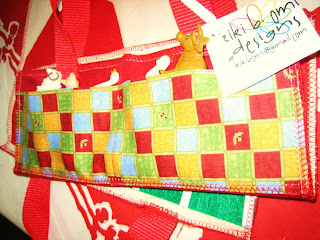
Introducing: The Farm Caddy and The Dino Caddy

After creating two versions (here and here) of my matchbox car caddy, I decided it was time to branch out. Sure, lots of kids love to play with Matchbox cars, but they also like to play with animals. So I came up with the Farm Caddy:
And the Dino Caddy:


Each provide portable entertainment and containment! (Do you like that line? I just came up with it!!) The entertainment comes on the inside in the form of a play-scape. For the Farm Caddy I created a barn, pasture, and fence. For the Dino Caddy I did my best to create a scene that suggested prehistoric, but also let the child's imagination do a little work. The containment is found on the outside where there are four pockets to neatly and effectively hold the animals in place until it is time for play.

a href="http://makingtheworldcuter.blogspot.com" target="_blank">Making
Sumo Sweet Stuff

Keeping It Simple
The Girl Creative

Becolorful

handmade projects


Monday, December 6, 2010

Homemade Christmas Gifts

Dare to DIY
This week's challenge from Kim? Dare to Give Homemade Christmas Gifts. Boy, oh boy, do I have the bases covered on this one! Unfortunately, I cannot share what I am giving because they haven't yet been given. However, I do have a few ideas up my sleeve. And for those of you who don't think that you can make these on your own, be sure to check out my Etsy shop where you can order any and all of the items I am featuring today.

This first gift is perfect for the girly-girl on your list. You know, the one who loves princesses and all things pink.
The Twinkle Toes Pedicure Kit. Everything your little lady needs for pedicure from decorated flip flops to toe separator and small bottle of polish. And when the pedicure is complete, she can finish off her look with an adorable flower clip.
To make your own pedicure kit, start by decorating purchased flip flops. Create a mesh bag by cutting and sewing together two netting rectangles. Add the sandals, polish, and separator to the bag. Tie the bag shut with coordinating ribbon. To make the flower clip, cut the stem off of an artificial daisy. (Mine came with the rhinestone added in the center, but you could easily do this on your own.) Stitch or glue an alligator clip to the back of the flower. Attach the flower clip to the top of the bag. Now you are set to give the perfect gift for the glamor girl.

Looking for something for the boys on your list? Why not make a car caddy? These fabric pouches are perfect for keeping busy bodies out of trouble when out and about. I love that they not only carry the cars, but they also provide an area to play with the cars. Here is one of my newly designed caddies.

You can find the tutorial for the original caddy here. For this version, I decided to make two pockets and attach them to the outside of the caddy. This left room inside to create two roads for play on the inside of the caddy. Be sure to check back later this week for other similar caddies that I have been busy designing.

I love creating and giving homemade especially during the Christmas season. Nothing beats being able to give a truly unique item given from the heart. I can't wait to see what everyone else is giving this year!
href="http://makingtheworldcuter.blogspot.com" target="_blank">Making
Sumo Sweet Stuff

Keeping It Simple
The Girl Creative


handmade projects


Dragonfly Designs


giveaways


Photobucket


Tuesday, April 27, 2010

Tutorial Tuesday: Car Caddy


Have you seen the cute as a button matchbox car caddies floating around on the internet? Homemade by Jill has a great one. I used her measurements, but changed it up a bit to make it a little bit easier. I will include my directions here. Unfortunately I didn't get any pictures of the process, but I think that it will be pretty clear.
Directions:
1. Cut two rectangles of fabric measuring 11 1/2" by 8 1/2". (I used one piece of corduroy and one piece of a cotton flannel car print.)
2. Cut one rectangle of fabric measuring 11 1/2" by 6". (In some of my caddies I used the corduroy for this step and in others I used the flannel.)
3. Press the 11 1/2" by 6" rectangle in half, wrong sides together, creating a 11 1/2" by 3" rectangle.
4. Place your pressed piece, pressed edge up, on the right side of a 11 1/2" by 8 1/2" corduroy rectangle. (Line up raw edges on the bottom and sides.)
5. Stitch through all three pieces of fabric in the middle of the set. Stitch two more rows 2 3/4" to the left and right of the middle. 


6. Cut 3" by 11" rectangle out of black felt for the road. Cut yellow gross grain ribbon into five 1" lengths for the center line of the road. (I adhered fusible web onto the ribbon before cutting it.) Sew the ribbon pieces down the middle of the felt.


7. Stitch road 1/2" from the top of the stitched set.


8. Place stitched set on top of remaining 11 1/2" by 8 1/2" rectangle, wrong sides together.
9. Serge around entire rectangle through all layers.
10. Cut two 12" lengths of 1" wide belting. Finish off the edges and sew on the top and bottom of the patterned piece for handles.