Friday, September 6, 2013

Foodie Friday: M & M Bark


This is as yummy as it looks! (Actually it is yummier, because I didn't take the pictures as soon as I made it and it is starting to bloom in these. But trust me, it is yummy!) I found this recipe on a blog I recently stumbled across called All Things Katie Marie. She is as cute as a button, has adorable style, and must have a ton of energy judging by all she blogs about. You can find the recipe for M & M Bark here. The only changes I made was that I used broken mini pretzels instead of sticks. I also somewhat doubled the ingredients to make a 9 by 13 inch pan. (I was bringing it to a gathering and wanted to make sure we had some at home. Smart, no?)
Now get thee to Katie's blog and make some of this salty, sweet goodness. Also, don't forget to enter the Origami Owl giveaway I have going right now!

Thursday, September 5, 2013

Origami Owl--A Review, Giveaway, and Party!

When my friend, Jenna, first started to talk about wanting to become an Origami Owl Designer about a year ago, I had never heard of the company. As with any great product, it has really spread in popularity and I can see why. Origami Owl is the only jewelry company that I know of that allows the customer to completely customize their own pieces.
One of the best parts of the Origami Owl company is that you really do create your own piece. They call their necklaces "Living Lockets." And here is why, you start by choosing from their hundreds of charms. They have something for everyone, occupations, hobbies, birthstones, initials, sports teams, and so much more. The first party I went to I sat and created all different charm combinations. It was so much fun! You can go here to check out all of the fun charms available!
Once you have your charms chosen, you get to pick out the locket that you would like to display them in. Each locket has a hinged front piece that allows you to add your charms and re-shut it with a strong magnetic closure. (Mine has never come open on accident!) You can always add another or swap them out whenever you want! Here are all of the locket choices!
Now that your locket is filled with charms just for you, it is time to select a chain. All of the chains are high quality and I love that you always switch your locket out and put it on a different chain. If you would like to see the chains you can click here.
But the fun doesn't end there! Origami Owl also has other options to help you customize your locket. I love the look of plates behind the charms and how they allow you to tell even more of your story! See all of the plate options here.
As if that wasn't enough, Origami Owl also offers the options of dangles that you can easily clip onto your locket creation. Dangle options are all listed here.
So far, I have kept my locket pretty simple, but I love that I can always add on new charms, plates, or dangles. I chose to use two plates, the big silver plate in the back says "blessed." And the smaller gold plate says "mama." The charm I currently have is the letter "S," our families last name initial. I love how my locket demonstrates the things most important in my life, my faith, my husband, and my children. Whenever I wear my Origami Owl locket I get compliments on it. I really think that its uniqueness attracts people to it. 
Do I have your interest yet?? I hope so because Jenna is giving away two $25 gift certificates good toward an Origami Owl purchase through her. Here is how to enter:
To allow you in on the Origami Owl fun, I am also hosting an Origami Owl online party from now until Friday, September 13 and Jenna has agreed to give Bowl of Cherrys readers a deal of a free charm with every $50 order!! (Just make sure to leave your email or phone number with your order so she can find out your free charm choice.) And if you are one of the lucky winners, you will be able to order an additional $25 of merchandise! Simply go to Jenna's Origami Owl page and start creating your Living Locket. Once you have everything you want in your shopping bag, click on check out and select the Bowl of Cherrys Online Party under the Jewelry Bar tab if you would like your order to be part of my party. If you have any questions, please contact Jenna at jennaeby@ymail.com.
I hope you enjoy creating your own unique Living Locket!! Let me know if you have any questions.

TERMS AND CONDITIONS: Giveaway ends September 11 at 11:59 pm. Open to Legal Residents (18 years of age or older) of the US only. Prizes cannot be shipped to PO Boxes. Winner will be selected by Rafflecopter.com and be notified by email. Winner will have 48 hours to respond before a new winner is selected. Please note that Bowl of Cherrys Blog if sponsor does not fulfill their prizes. I have represented the sponsor with the expectation they will fulfill their prize and in a timely manner. I will contact the sponsor regarding your prize(s). I will make every effort to assist you in obtaining your prize. If there is an issue with sponsor, please notify me within 30 days for assistance, after that we may be unable to assist you. The product offered for the giveaway is free of charge, no purchase necessary. My opinions are my own and were not influenced by any form of compensation. This promotion is in no way sponsored, endorsed or administered by, or associated with, Facebook. We hereby release Facebook of any liability. I do not share or sell information and will use any information only for the purpose of contacting the winner.
I purchased all of the pieces for my own Origami Owl Locket and was not compensated for this review. The thoughts and opinions are all my own.

Wednesday, September 4, 2013

Birthday Crowns

Little Miss W was in love with her crown! She is such a sweet little girl!

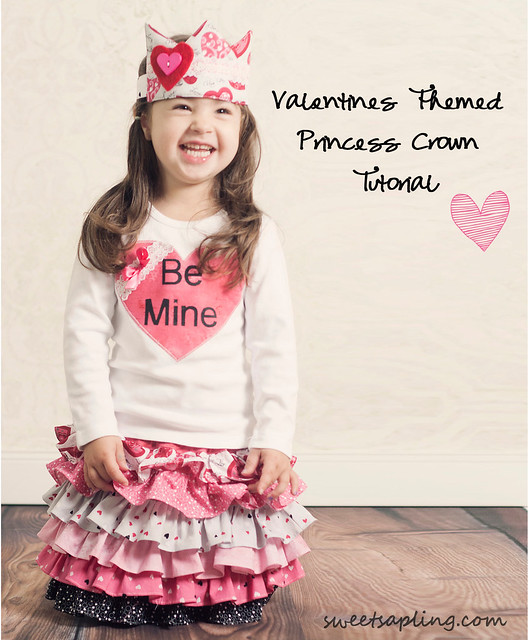
Like I said yesterday, I had been wanting to make fabric crowns for a while and Cream's birthday was the perfect excuse. I started looking around the internet and found some tutorials to base one off of.
These were some of my favorites that had the look I was going for:
How to Make a Superhero Headband from Curly Pops
Valentines Themed Princess Crown from Sweet Sapling
Fabric Crown from The Little Giggler
Here is the best shot I got of both girls with their crowns.

In the end, I pretty much used the tutorial from The Little Giggler. I did add some felt embellishments, just a pinked circle and a #1 and #2. I ended up using an elastic headband I had around for the elastic in the back. It worked out well since it was a little wider and had some non-stick stripes on the back.
We even had Cream where hers on her actual birthday when we went out with some friends for a birthday dinner.


Tuesday, September 3, 2013

An Orange and Pink Birthday

Cream's 2nd birthday party was a joint party with another little girl in our playgroup who was turning one. Her mother and I decided to do the party together since the girls' birthdays are less than a week apart and we would both be inviting our playgroup. This also allowed us to do the party at a local hotel with a great swimming area. We purchased the birthday party package which gave us a poolside room to use during the party, access to the pool for all of our guests, a party area, and pizza and pop. It really worked out well and everyone enjoyed playing in the pool.
We really didn't have a theme, but we used these invitations from Walgreens and went with the pink and orange theme from the invitations. One of our friends graciously took pictures of the girls for the invitation. They turned out really well, especially considering that we were working with a one year old and a two year old!
My fellow party mom also had this great banner printed at Walgreens! Who knew you could get so many great things there??!!
For favors we had the same friend who took the pictures make us some decorated cookies. (Got to love having talented friends who are willing to help!!) They turned out darling!
As for other decorations, we kept it pretty simple. I looked around the house and grabbed a pink and an orange sand bucket that we tucked the cookie favors into. I found some dollar spot wrapping paper that we used on the table. We also had a couple of pink and orange balloon bouquet that I added a decorated one and two to the base of.

I made cupcakes and decorated them with toppers.
We had looked at party hats at the store, but didn't find anything we liked. I had been thinking about making party hats for a while now and decided now was the time. I will post a tutorial tomorrow, but here is how the birthday girls looked in their hats.
We all had a great time celebrating two little girls!

Monday, September 2, 2013

Preschool at Home

Over the course of the past couple of weeks my Facebook feed and my Instagram has been filled with first day of school pictures. It is so fun to see these young fresh faces excited for a year filled with learning. And while Peachy could have joined the ranks in a three year old preschool class last year, we decided to keep her home. And we made the same decision this year. 
It wasn't an easy decision. I went back and forth on weather we should send her to preschool. Academically, I know she really doesn't need it. Sure, there will always be something new that she could be learning, but I am confident that she will have what she needs heading into preschool next year. Socially, she does fine as well. We participate in enough activities with other children that she has plenty of opportunities to practice her social skills.
So really that just left the fact that I knew she would enjoy the experience. And while there is nothing wrong with allowing your child to participate in something for simple enjoyment, it just didn't seem to be the right decision for our family. And there are lots of things that went into the final decision. 
I won't stand on my soap box for long here, but I will share a few of my thoughts on where America is on early childhood. I really think that we have been brainwashed into thinking that our children NEED to go to some form of education early on. For some reason, according to our society, just being an attentive stay-at-home parent isn't good enough for our children anymore. Yet, for centuries before this, it was the norm that preschoolers stayed at home. Why all of a sudden do they need an education in a classroom setting? When I tell people that we won't be sending Peachy to preschool, they usually say, "That makes sense. You have the education background." And while, yes, my degree is in education and I have taught preschool for many years, that doesn't mean that a parent with any other background can't teach their own children. The things that a child needs to know before entering kindergarten can easily be taught while going through your normal day. Colors, letters, counting, sorting, patterning, can easily be worked into the daily chores and activities around a house. You don't need to sit down and write a single lesson plan to talk about each of those areas. Ok, I am done now.
Please don't think that I am looking down at any of you who are sending your children to preschool. Some kids do need it. Some parents do need it. Will there be days that I will wish I had sent Peachy to preschool. Yes. (And I know because I have already had them!) But, I just am frustrated with the idea that everyone NEEDS to go to preschool. I don't want stay-at-home parents to feel that if they don't send their children they will enter kindergarten behind.
I am hoping to share some of the things that we do this year as we do preschool at home. I have already ordered the ebooks:
And I purchased these sets of sensory alphabet cards:
I have a good stock of construction paper, regular paper, glue sticks, writing utensils, and picture books on hand. I am excited for the year ahead and seeing where it will lead us!