Showing posts with label Tutorial Tuesday. Show all posts

Wednesday, September 4, 2013

Birthday Crowns

Little Miss W was in love with her crown! She is such a sweet little girl!

Like I said yesterday, I had been wanting to make fabric crowns for a while and Cream's birthday was the perfect excuse. I started looking around the internet and found some tutorials to base one off of.
These were some of my favorites that had the look I was going for:
How to Make a Superhero Headband from Curly Pops
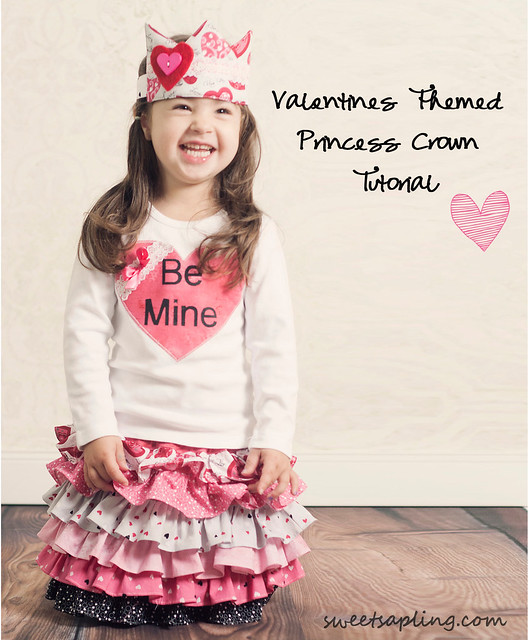
Valentines Themed Princess Crown from Sweet Sapling
Fabric Crown from The Little Giggler
Here is the best shot I got of both girls with their crowns.

In the end, I pretty much used the tutorial from The Little Giggler. I did add some felt embellishments, just a pinked circle and a #1 and #2. I ended up using an elastic headband I had around for the elastic in the back. It worked out well since it was a little wider and had some non-stick stripes on the back.
We even had Cream where hers on her actual birthday when we went out with some friends for a birthday dinner.


Tuesday, July 19, 2011

tutorial Tuesday: Barrette Holder

Little Peachy, like most two year old girls, has a lot of barrettes. Up until now, I stored those barrettes in a little basket in her room. While that worked for the most part, there were always barrettes getting lost in the bottom that I had forgotten about. I decided it was time to make a new barrette holder that would display all of the barrettes and serve as a decoration for her "new" room.
I started with an old picture frame I had laying around which I spray painted white. I then covered the glass with some fabric that I had in my stash. On top of the fabric, I glued strips of ribbon going from the back side of glass at the top to the back side of glass at the bottom. (Guess what? I also had all of this ribbon on hand. Do you sense a theme??) Then all that I needed to do was put the glass back into the frame and I had not only a new barrette holder, but also some new art for Peachy's room.
All those barrettes for one little girl!!
PS I took the first picture outside, but since it was so hot and humid I had to wait for the camera to de-fog first. I decided to just take the second one inside.

I am linking to:
Tip Junkie handmade projects

: Todays Creative Blog


Dragonfly Designs


Photobucket

Somewhat Simple
:
Photobucket

Photobucket


Photobucket
Photobucket" />

Sewplicity Blog

Monday, June 20, 2011

Tutorial Tuesday: Lined Pillowcase Dress

Last summer I made my first pillowcase dress and became addicted. They are super simple to create and can be made in so many different fun fabrics. You can see some of the other pillowcase dresses I have made here and here. After posting some of my pillowcase dresses, I received requests to post a tutorial. And after almost a year, it is here, The Lined Pillowcase Dress Tutorial.

Lined Pillowcase Dress Tutorial
MATERIALS: Fabric: For toddler sized dresses, you will need about one yard of lining fabric, one yard of main dress fabric, and a quarter yard of contrast fabric for the bottom band. (If you are wanting to make a larger size you may need to purchase more fabric.) Notions: You will need approximately two yards of ribbon for the shoulder straps and matching thread. You will also need some sort of large paper for your pattern pieces. I like to use tissue paper or a light weight wrapping paper. Optional: I like to add some sort of flower pin to my pillowcase dresses. Sometimes I create the pin with a fake flower while other times I use fabric scraps from the dress and sometimes I use ribbon that matches the shoulder straps. A matching button added to the flower always adds some extra interest.
DIRECTIONS:
a) tracing dress
1. Trace a dress in the size you will be making. All that you need here is the body shape of the dress. I have found that a sleeveless A-line dress works the best. I like to fold the dress in half and place the folded edge on the edge of my paper. Once the body is traced, you will want to add a seam allowance all the way around. For this dress I used a half inch seam allowance. Label this pattern piece as your "lining". Trace your dress again, but this time stop tracing about three inches from the bottom hem of the dress. Add your half inch seam allowance. Label this pattern piece as your "main body". Trace along the bottom of the dress, draw up three inches and following the contour of the bottom, draw a line back toward the fold. Add in your half inch seam allowance. Label this piece your "bottom band". You are now ready to cut out your fabric.
b) pin pattern pieces to dress
2. With the straight edge of your pattern pieces along the fold of your fabric, pin your pieces to the fabric. You will need to cut two of each pattern piece on the fold.
3. Once your pieces are all cut, you are ready to sew. Edge finish each piece. I use a serger, but a zig-zag stitch on your machine will work as well.


c) pin bottom band to main body
d) press seam open
4. With all pieces edged, it is time to sew your dress together. Pin the bottom bands to the main body with right sides together, following the curve. Sew along edge allowing for your seam allowance. Once sewn, remove pins and press seam open. Repeat with remaining bottom band and main body.
e) pin side seams together
5. Pin main body pieces together along side seams with right sides together and sew along seam allowing for seam allowance. Remove pins and press seams open. Repeat with both sides of the lining pieces.


f) pin lining to main body at under arm seams
g) clip curves


6. You should now have the main body of the dress and the lining of the dress complete. Now we sew the body to the lining at the under arm seams. Have the main body of the dress with right sides out and the lining inside out. Place the lining over the main body matching up side seams. Pin lining to the main body along the under arm seams. (Remember to have right sides together.) Sew the lining to the main body along under arm seams. Remover pins and clip the curves. Turn the lining to the inside. Press the under arm seams flat.
h) press down one quarter inch
i) press again at three quarter inch


j) stitch the ribbon into the dress on each side
7. Almost done! Now we are ready to make the casing along the top unfinished seam of the dress. Press the edge of the seam down one quarter of an inch and then press it down again another three quarters of an inch. Stitch along the bottom edges of the front and back to create the casing for the ribbon. Cut your ribbon into two, one yard pieces. Thread each piece of the casing in the front and the back. (You will want to secure your ribbon to the dress. You can do this in one of two ways. On this dress I gathered the fabric with the ribbon and then sewed it into place. I have also gathered the fabric and knotted the ribbon where it meets the dress. I like the looks of sewing the ribbon, but if you think you would like to remove the ribbon at some point you may want to go with the knotted ribbon.)
8. The final step to the dress is to hem the lining and the main body. Press a half inch hem on each layer and stitch.
You are done! Enjoy your dress!!
A great feature of this dress is that it can be reversible.
Close up of the flower pin I made to match this dress.

I am linking to:
Tip Junkie handmade projects

Todays Creative Blog


Dragonfly Designs


Photobucket

Somewhat Simple

Photobucket