Pages
▼
Friday, May 28, 2010
Foodie Friday: Cake Balls
I know that cake balls and pops are nothing new to the blogging world, but thought that I would share the two batches I made with you anyway. (Not literally share, though. I have shared many already and need the rest for the weekend. You're on your own if you literally want some.)
Ingredients:
1 box cake mix (and the ingredients it requires) (I used funfetti for the white and chocolate for the chocolate)
1 tub frosting (White for the white and chocolate for the chocolate)
melting chocolate (I used Candy Quick for most of these, but also used some almond bark)
sprinkles (I found the red, white, and blue sprinkles at the Target Dollar Spot)
Directions: (You can also find excellent directions over at Bakerella)
1. Mix and bake cake according to box directions in a 9x13 inch pan.
2. Allow cake to thoroughly cool.
3. Crumble cake into a large bowl.
4. Stir in tub of frosting. (It really is easiest to just use your hands for this.)
5. Form balls with the cake/frosting mixture. (I used my cookie scoop to get the ball started and then finished it off with my hands.)
6. Place the balls on a parchment covered baking sheet and freeze overnight.
7. The next day, melt your chocolate however you prefer. (I use the microwave for small batches.)
8. Dip each ball in the chocolate. Before the chocolate hardens, top with sprinkles.
9. Allow to harden and refrigerate until use.
10. As long as you are dipping the cake balls, you may as well dip some strawberries as well.
I am linking to:
Thursday, May 27, 2010
Summer Love
Have you been seeing the magazine coupons for 20% off one Merona item from Target? I scored three in the last few weeks. (Yes, I may have a slight addiction to magazines.) I also use one of my coupons to score this dress.
At the store, I just popped it in my cart. (Trying on clothing in a store with a one year old doesn't always work out so well.) When I did finally get to try it on, I was in love. I normally wouldn't have picked this particular color, but I went out a limb and really like it. The way the soft fabric is so comfortable and the cut is very flattering on me. I can't wait to wear it as a fun, casual summer dress.
Wednesday, May 26, 2010
Tuesday, May 25, 2010
Tutorial Tuesday: Eye Spy Bags
Here is the eye spy bag tutorial that I promised from Peachy's birthday party. Once again, I have to apologize for my lack of photographs to accompany this tutorial. It is hard for me to stop and take a break once I start a project even though it would probably save me time in the long run if I didn't have to draw up pictures. Oh well.
Supplies:
-fabric (I used a cotton flannel, but pretty much any fabric should work.)
-clear craft vinyl (This can be purchased by the yard from fabric stores.)
-tissue paper
-rice
-small items to place inside the bags (buttons, small toys, paper clips, paper pieces, et cetera)
Cutting Instructions:
For each bag cut
-one 5.5 x 5.5 inch square from fabric
-four 4.5 x 1.5 inch rectangles from fabric
-one 3.5 x 3.5 inch square from vinyl
Sewing Instructions: (All seams will be 1/4 inch, unless otherwise noted.)
1. Place one fabric rectangle vertically, right side up. Place another fabric rectangle on top of the first horizontally, right side down. Your fabric will look like this:
2. Stitch the rectangles together along the right side as indicated in diagram A.
3. Open along the seam so both pieces are right side up.
4. Place a third rectangle on top of the bottom rectangle, right side down. Your fabric will look like this:
5. Stitch the rectangles together along the top as indicated in diagram B.
6. Open along the seam so all three pieces are right side up.
7. Place the last rectangle on top of the right rectangle with right sides together. Your fabric will look like this:
8. Open along the seam. Match up the last rectangle's bottom left side with the first rectangle's top side, and stitch with right sides together. Open along seam. Your make a window and look like firgure D.
9. Place the vinyl square on the wrong side of the rectangle pieces. Place a piece of tissue paper over the vinyl to prevent your presser foot from sticking. With the fabric side up, zig-zag around the window opening securing the vinyl to the fabric.
8. Gently tear the tissue paper from the vinyl.
9. Place the window piece on top of the remaining 5.5 inch square, right sides together. Zigzag around the edges making sure to leave an opening for turning.
10. Using the opening, turn the bag right sides out.
11. Place the small items into the bag using the opening.
12. Fill the bag with approximately 3/4 c of rice.
13. To finish the bags, whip stitch the opening shut with a needle and thread.
Monday, May 24, 2010
A Splash of Red
Remember when I picked up these wire baskets at the junk sale?
I finally got around to using them!! When I picked them up I knew there could be many uses for them, but my first thought was to use them for potted plants. Last weekend I was able to spray paint some of our pot collection so that they would all match. We would eventually like to add some red accents to the porch, so I painted the pots red. And here is the finished product:
Now we just have to get the window boxes built and the door painted red! (Any advise on painting the door???)
Friday, May 21, 2010
Foodie Friday: Shish Kabobs
Oh yeah! It is grilling season!!! You can find me out on our front porch grilling up some deliciousness! Wednesday evening I grilled up one of my favorites, shish kabobs. I didn't get a picture taken, but here is a stock picture just to get the saliva flowing.
Ingredients:
-one pint small to medium tomatoes
-one pint white mushrooms
-One medium onion, cut into sections
-one medium yellow squash, cut into disks
-one medium steak, cut into squares
-olive oil
-balsamic vinegar
-Montreal Steak Seasoning
-salt and pepper
Directions:
1. Place vegetables and steak onto skewers. (I have found that it is easier to grill skewers with the same ingredients rather than alternating like the picture. That way you can be more specific in your grilling times.)
2. Drizzle steak with vinegar and oil and season with seasoning.
3. Drizzle veggies with oil and season with salt and pepper.
4. Grill over medium/high heat until each ingredient is done.
5. Remove ingredients from skewers and gently mix in large bowl.
6. Serve alone or over a bed of rice.
Thursday, May 20, 2010
Not So Little Anymore
Last week Friday we had Peachy in for her one year check-up. Just as we thought, we have a healthy, thriving one year old on our hands. What a blessing from the Lord! She now weighs almost 23 pounds (about 75th percentile) and is about 31 (about 99th percentile) inches long. She is a long and lean little girl.
Peachy is now a pulling up machine. She reminds me of a rock climber. Any little ledge is a finger grip for her. Like the less than centimeter lip between the TV screen and the TV box. She has figured out drawers, cupboard doors, and regular doors. While we were at a friend's house the other day I looked over to see her sitting in front of an open hutch door. What was in the door? Oh, just my friend's crystal! Thankfully she hadn't tried to lug any of it out yet. She is a master of the crawl and is just starting to take tentative steps while using the death grip on furniture.
She is able to communicate with us more and more. She says momma and daddy. (Momma is always said with a bit of whine, while daddy comes out with excitement. However, she is still quite the momma's girl.) She also says "woof" when she sees a dog and "oooh!!" when something interests her. I can usually tell by her inflection or by her holding both her hands out when she wants something. (Then the game is to figure out what it is that she wants.) The universal sign of clapping can hold many meanings like more and all done. She is a very good eater with a penchant for carbs and sweets. She is weaned now drinking whole milk exclusively. There is nothing that she loves more than making chaos out of order. She loves her Little Tikes slide that currently resides in our front yard. She is still very active, but has won over our hearts all over again by her willingness to cuddle, hug and kiss when the mood strikes her. Out Little Peachy has made our parenting first year of parenting a true joy and blessing. Overall she can be described as content yet inquisitive all rolled into one happy, little ball.
Wednesday, May 19, 2010
Its Sew Easy
This past weekend was the perfect rummaging weekend. The weather was beautiful and there were TONS of garage sales to hit. Peachy got up early which allowed me the opportunity to plan out my route. After she was down for her morning nap I hit the road while M stayed home. In about one hour I was able to make it to about 7 sales and came home with lots of great deals, all for Peachy. Mostly I picked up clothes, but I couldn't help but grab up a few toys for her as well. At one sale I picked up what I thought was a simple toy sewing machine. Upon further inspection I the name Romper Room on the back. After a quick Google search, I realized I had bought an Its Sew Easy sewing machine circa 1980. It will be interesting to see if I can actually get it to work again. I'm sure Little Peachy will soon be sewing a puppet of her own.
You can see the original TV commercial here.
Tuesday, May 18, 2010
Tutorial Tuesday: Child's Soft Chair
Peachy recently enjoyed playing with a friend's Pottery Barn chair like this one:
I decided to set out and see if I could make one for her.
Pattern from Etsy: $5
Fabric from Mill End Textiles: $5
Foam: $45
Quilt Batting: $10
Other Notions: $5
The pattern was okay, but not extremely easy to figure out. I would say that it is for an intermediate sewer. I labeled my pattern pieces as I cut them out. This really helped me out as I was sewing. I also ended up putting the zippers in the wrong way. This made getting the foam into the chair cover a bit of a challenge. (Good thing I am married to an engineer.)
I am happy with how the chair turned out, but making it myself really didn't save me any money. If I were to do it again, I would try to get the foam with coupons or on sale.
Monday, May 17, 2010
My Good Friend, Poke A. Dot
I went with a polka-dot theme for Peachy's birthday bash. I highly recommend it to anyone looking for a super easy party theme. Polka-dots are huge right now and I didn't have to search very hard to find the items I needed for the party.
It all started with these Wilton Sprinkles in Jumbo Confetti. I knew that even I, with my limited cake decorating abilities, could make a cake cute with these sprinkles.
(Don't you just hate it when Blogger is a bad boy and won't cooperate with you? Really these pictures are the other way on my computer. Bad Blogger, bad, bad, Blogger.)
The cake was meant to look like a large cupcake. I didn't purchase the large cupcake cake mold, so a bit of it is left to the imagination. The base was made from two 9 inch round cake pans and then I used a metal mixing bowl to create the domed top. We frosted the rounds as you would a layer cake and then piped lines up the sides. After frosting the bottom, we placed the top on, frosted it, added the jumbo sprinkles and the candle.
(M even got in on the cake decorating action with his mad piping skills.)
The table cloth was made with white muslin and polka-dot fabric all purchased from Jo-Ann Fabrics.
The favors were little eye spy bags made with polka-dot flannel that I had on hand. (You can see them surrounding the cake in the picture above.) I will post a brief tutorial on how I made them soon.
My mom made Peachy her large bib without even knowing the theme. Way to go, grandma. (We used to have bibs made in this style when we were kids. They are awesome at full coverage and can be decorated to match the occasion. You can't see in the picture, but mom put a cupcake with a #1 candle on the bib as an appliqué.)
I decided to make Peachy a little chair ala Pottery Barn as a birthday gift and just happened to pick a polka-dot fabric. The chair was a big hit at the party with the guests and Peachy climbs into it as often as she can.
Of course I made Peachy's #1 onesie. (You can always order one for your little one from my Facebook site, kiki b. omi designs.) I made her leg warmers out of a pair of knee high socks from Target. I will post a tutorial someday on that as well. Her skirt is from Target, her shoes are from a garage sale last summer, and the barrette is from Wal-Mart.
(Okay picture of me. Okay picture of the onesie. Not so hot picture of Peachy.)
I found these great buckets for drinks at Wal-Mart on clearance for $1.50!! Awesome!
It all started with these Wilton Sprinkles in Jumbo Confetti. I knew that even I, with my limited cake decorating abilities, could make a cake cute with these sprinkles.
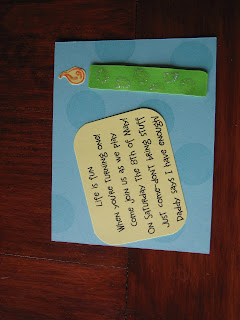
I purchased card stock for the invitations using the sprinkle colors as my guide. I also purchased the Candelight stamp set from Close to My Heart.)
The cake was meant to look like a large cupcake. I didn't purchase the large cupcake cake mold, so a bit of it is left to the imagination. The base was made from two 9 inch round cake pans and then I used a metal mixing bowl to create the domed top. We frosted the rounds as you would a layer cake and then piped lines up the sides. After frosting the bottom, we placed the top on, frosted it, added the jumbo sprinkles and the candle.
(M even got in on the cake decorating action with his mad piping skills.)
The table cloth was made with white muslin and polka-dot fabric all purchased from Jo-Ann Fabrics.
The favors were little eye spy bags made with polka-dot flannel that I had on hand. (You can see them surrounding the cake in the picture above.) I will post a brief tutorial on how I made them soon.
My mom made Peachy her large bib without even knowing the theme. Way to go, grandma. (We used to have bibs made in this style when we were kids. They are awesome at full coverage and can be decorated to match the occasion. You can't see in the picture, but mom put a cupcake with a #1 candle on the bib as an appliqué.)
I decided to make Peachy a little chair ala Pottery Barn as a birthday gift and just happened to pick a polka-dot fabric. The chair was a big hit at the party with the guests and Peachy climbs into it as often as she can.
Of course I made Peachy's #1 onesie. (You can always order one for your little one from my Facebook site, kiki b. omi designs.) I made her leg warmers out of a pair of knee high socks from Target. I will post a tutorial someday on that as well. Her skirt is from Target, her shoes are from a garage sale last summer, and the barrette is from Wal-Mart.
(Okay picture of me. Okay picture of the onesie. Not so hot picture of Peachy.)
I found these great buckets for drinks at Wal-Mart on clearance for $1.50!! Awesome!
I made the food prep super easy by ordering 4 foot subs from Wal-mart. (This was a very economical way to feed lots of people. We had plenty with the two 4 foot subs. So much that M and I worked hard all week at finishing the left-overs off before they went bad.) Throw in a veggie tray, a fruit platter, and some chips and you've got yourself a party!
Friday, May 14, 2010
Foodie Friday: Rhubarb and Apple Coffee Cake
I recently received the mother lode of rhubarb. (Or should I say, mother-in-law lode, since it was from M's mom? Don't worry, I won't quit my day job.) After slicing, dicing, and freezing 24 cups, I used the remainder to make two of these coffee cakes. I found the original recipe in my Taste of Home Cookbook. Since I had apples in the freezer waiting to be used, I decided to add them to the mix.
Ingredients:
-1/3 c butter, softened
-1 c sugar
-1 egg
-1 t vanilla extract
-2 c all-purpose flour
-3 t baking powder
-1/2 t salt
-1 c milk
-3 1/2 c chopped fresh or frozen rhubarb, thawed and drained
-1 c sliced apples
-3 T sugar for sprinkling (The original recipe did not call for this extra sugar, but I thought that it might be needed to take away some of the bite of the rhubarb.)
TOPPING:
-3/4 c packed brown sugar
-1/4 c butter (The original recipe called for the butter to be melted. After doing this, I decided that it may be better to just have it softened and using a pastry blender to mix it with the cinnamon and brown sugar. The melted mixture was hard to crumble sprinkle over the cake as the recipe directed.)
Directions:
1. In a large mixing bowl, cream butter and sugar until light and fluffy. Add the egg and vanilla; beat well. Combine the flour, baking powder and salt; add to creamed mixture alternately with the milk.
2. Transfer to a greased 13-in. x 9-in. x 2-in. baking dish. Spoon rhubarb over top to within 1/2 in. of edges. (I then sprinkled the extra sugar on top of the rhubarb.) Combine topping ingredients; sprinkle over rhubarb.
3. Bake at 350 for 45-55 minutes or until a toothpick inserted near the center comes out clean. Cool in pan on a wire rack.
Thursday, May 13, 2010
Wednesday, May 12, 2010
You're My Little Potato
Well, you are actually not my Little Potato. Little Peachy is actually my Little Potato. (How is that for confusing?) Thanks to the ONE YEAR (yes, you read that correctly) slide show I just put together for LP, that song is in my head. Not a bad song to have in one's head or in their one year slide show.
We had quite the weekend celebrating Peachy's birthday and Mother's Day. It started with the arrival of my parents Friday evening who were followed by M's parents on Saturday afternoon. Saturday was spent preparing for Peachy's party which was held late Saturday afternoon. The party was wonderful and deserving a post of its own. Sunday morning found me looking for our local paper to arrive before we headed off for church. Peachy and I graced the front page in a large full color photo!! A reporter had contacted me a few weeks ago about a feature story she was writing about moms who had their babies on Mother's Day. I didn't have to think long before agreeing to that one.
After church we all headed off to a 5k walk that raised $10,000 for breast cancer.
M's parents headed home after the walk and mine left Monday afternoon. (But not before we hit some of the fun stores downtown. One of the clerks even recognized Peachy from the paper!!)
I keep telling everyone that some days it is hard for me to even realize that I am a mom, much less the mom of a one year old. Yikes!
All in all, a wonderful long weekend celebration!
Tuesday, May 11, 2010
Tutorial Tuesday: Homemade Laundry Soap
I have made several batches of this laundry soap since Little Peachy was born. Currently we are back to store bought, but I may make this recipe again someday.
I found this recipe over at Tammy's Recipes.
Tutorial Rating-- (I will use a three point scale to rate the tutorial with three being excellent and one being poor)
Accuracy of Tutorial: 3
Written Directions: 3
Visual Directions: 3
Type of Tutorial: recipe, laundry
Skill Level: Anyone
When I made it, I used a Pampered Chef cheese grater to grate the soap. That made the job quick and easy. This recipe didn't work well on tough stains and also doesn't mask odors, but for everyday laundry it gets the job done.
Thursday, May 6, 2010
Foodie Friday: Pesto Tomato Pizza
This is a yummy, easy, and quick meal. (I made this up while I abandoned my household chores for sewing last week.)
Ingredients:
-whole wheat flour tortilla
-basil pesto
-grape tomatoes, halved
-shredded mozzarella (Remember how I told you I was in a hurry when I made this? Well, the mozzarella was frozen, so I grabbed some co-jack out of the fridge, cut it into small chunks and went with it.
Directions:
1. Spread tortilla with pesto.
2. Add tomatoes.
3. Top with cheese.
4. Broil in toaster oven until cheese is melted and tortilla is crispy.
This would also work well with a pita!
Wednesday, May 5, 2010
Wonderful Weather
Our April was beautiful. We had unseasonably wonderful weather. (So much so that it made the seasonable weather this weekend feel like we had gone back three months.) Little Peachy and I were able to get out and enjoy many walks. We are even able to go out when the Little Monkey is over thanks to these little guys.
These bad boys are able to connect two umbrella strollers to make a double stroller. I was pretty impressed with how well the strollers worked in tandem. Another bonus? No large double stroller to store. Here are the two munchkins all ready to go.
"Hurry up, mom. We're ready already!"
"Are you ready, friend?"
"There. Now we are ready to go."
"You better get a move on it, mom."
Tuesday, May 4, 2010
Tutorial Tuesday: Baby Leggings
I was so excited when I found this tutorial when Little Peachy was, well, little. I quickly bought some socks and went to work. Here is Peachy showing off her mama made leggings and mama decorated onesie around her 6 month birthday:
Type of tutorial: Sewing, Baby
Skill Level: Supper easy :o)
Changes I've made: The only change that I have made is that I use my serger.
I have been collecting socks to make more leggings. I got them all cut up, thinking that I would sell them at the sale and give them as gifts. They are still sitting in pieces by my machine. Some other day.
Monday, May 3, 2010
Fantastic Frames
Remember when I had my big debut? This weekend I was able to participate in my second sale. I work well on a deadline, which means I was still working on finishing projects a half hour before the sale started. (I have promised myself that I will put an earlier deadline for any future sales.)
I made more embellished children's shirts and onesies, crayon rolls, car caddies, diaper and wipe pouches, decorated flip-flops, baby cakes, Lil' Guy Ties, and decorated frames. Keep an eye on my Facebook site to get your hands on the leftovers! (If you haven't already, click on the like button for "kiki b. omi designs." There may be something special for one of you soon. :o)
Remember these cuties? I had so much fun making them that I decided to do some more.create some more and sell them in my space. Here are some of my favorites from this time around:
If only I could decorate my house as easily and cutely as I decorated these frames.