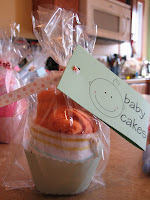
1) They are cute. (The momma needs cute)
2) They are unique. (The momma doesn't want ten of the exact same gift.)
3) They are practical. (While the momma wants cute and unique, she doesn't want something that she is just going to trip over for the next year until she decides to sell it on Craigslist.)
While I knew I could probably figure out how to make these without a pattern, I don't like to reinvent the wheel. If someone has already gone to the trouble of figuring it out, why not allow them to lead the way. You know what? I couldn't find a single pattern or tutorial out there. So, I took it upon myself to figure it out. Now I am posting a tutorial to help lead the way for all of you. (After trying to take pictures and figure out how to describe my technique, I may know why no one else has attempted to make this tutorial in the past. But I decided to give it a shot anyway.)
- Onesie (0-3 month)
-Infant washcloth
-One pair of infant socks
-Two straight pins
-One cupcake liner/wrapper
-One cellophane treat bag
-One clear rubber band
-8 inches of coordinating ribbon
Directions:
1. Stack socks with one slightly higher than the other.
Starting from the toe end, roll socks.
2. Fold Onesie into thirds. (Sleeves should just overlap and the leg openings should be just past the fold.)
Fold up the snap bottom toward the sleeves.
Fold one sleeve over the top of the other sleeve. (You should be left with a relatively uniform width from the top to the bottom.)
Place the rolled socks toward the bottom of the Onesie and tightly roll the Onesie and socks from top to bottom. (You may have to do some slight tucking and adjusting along the way.)
3. Fold the washcloth into thirds.

Place Onesie/sock roll onto the washcloth and roll it up in the washcloth. Leave about a half inch of the washcloth below the Onesie.
Insert a pin under the top layer of washcloth through the roll to hold together.
Fold the corners of the washcloth over on the bottom so that they all meet in the middle. Poke a pin through all of the layers.
4. Place cupcake roll into a cupcake liner or wrapper. (I used the template from Skip to my Lou and traced it onto scrapbook paper that I already had.)
5. Place the cupcake into a cellophane treat bag. (I had mine on hand, but I think that I purchased them from Michaels.)
6. Secure the top of the bag with a clear hair rubber band.
7. Tie your ribbon over the rubber band.
8. I also made these tags. Pink for the girl Baby Cakes, Blue for the boy Baby Cakes, and green for the either/or Baby Cakes. (You can print your own copy by going here.)


Thank you for sharing this. ADORABLE. And, I have four friends having babies. This could come in handy.
ReplyDeleteSuper cute idea! Thanks for taking the time to post this tutorial.
ReplyDeletethis is the cutest idea ever! thanks for sharing!
ReplyDeleteSo cute! Thanks for sharing.
ReplyDeletethese are so cute! thanks for sharing. my friend was looking for something fun and creative for her sisters baby shower and I think we just found it!!!
ReplyDelete